Getting started with Kiwi
1. Accessing Kiwi
Kiwi offers three secure login options to ensure a seamless and safe experience.
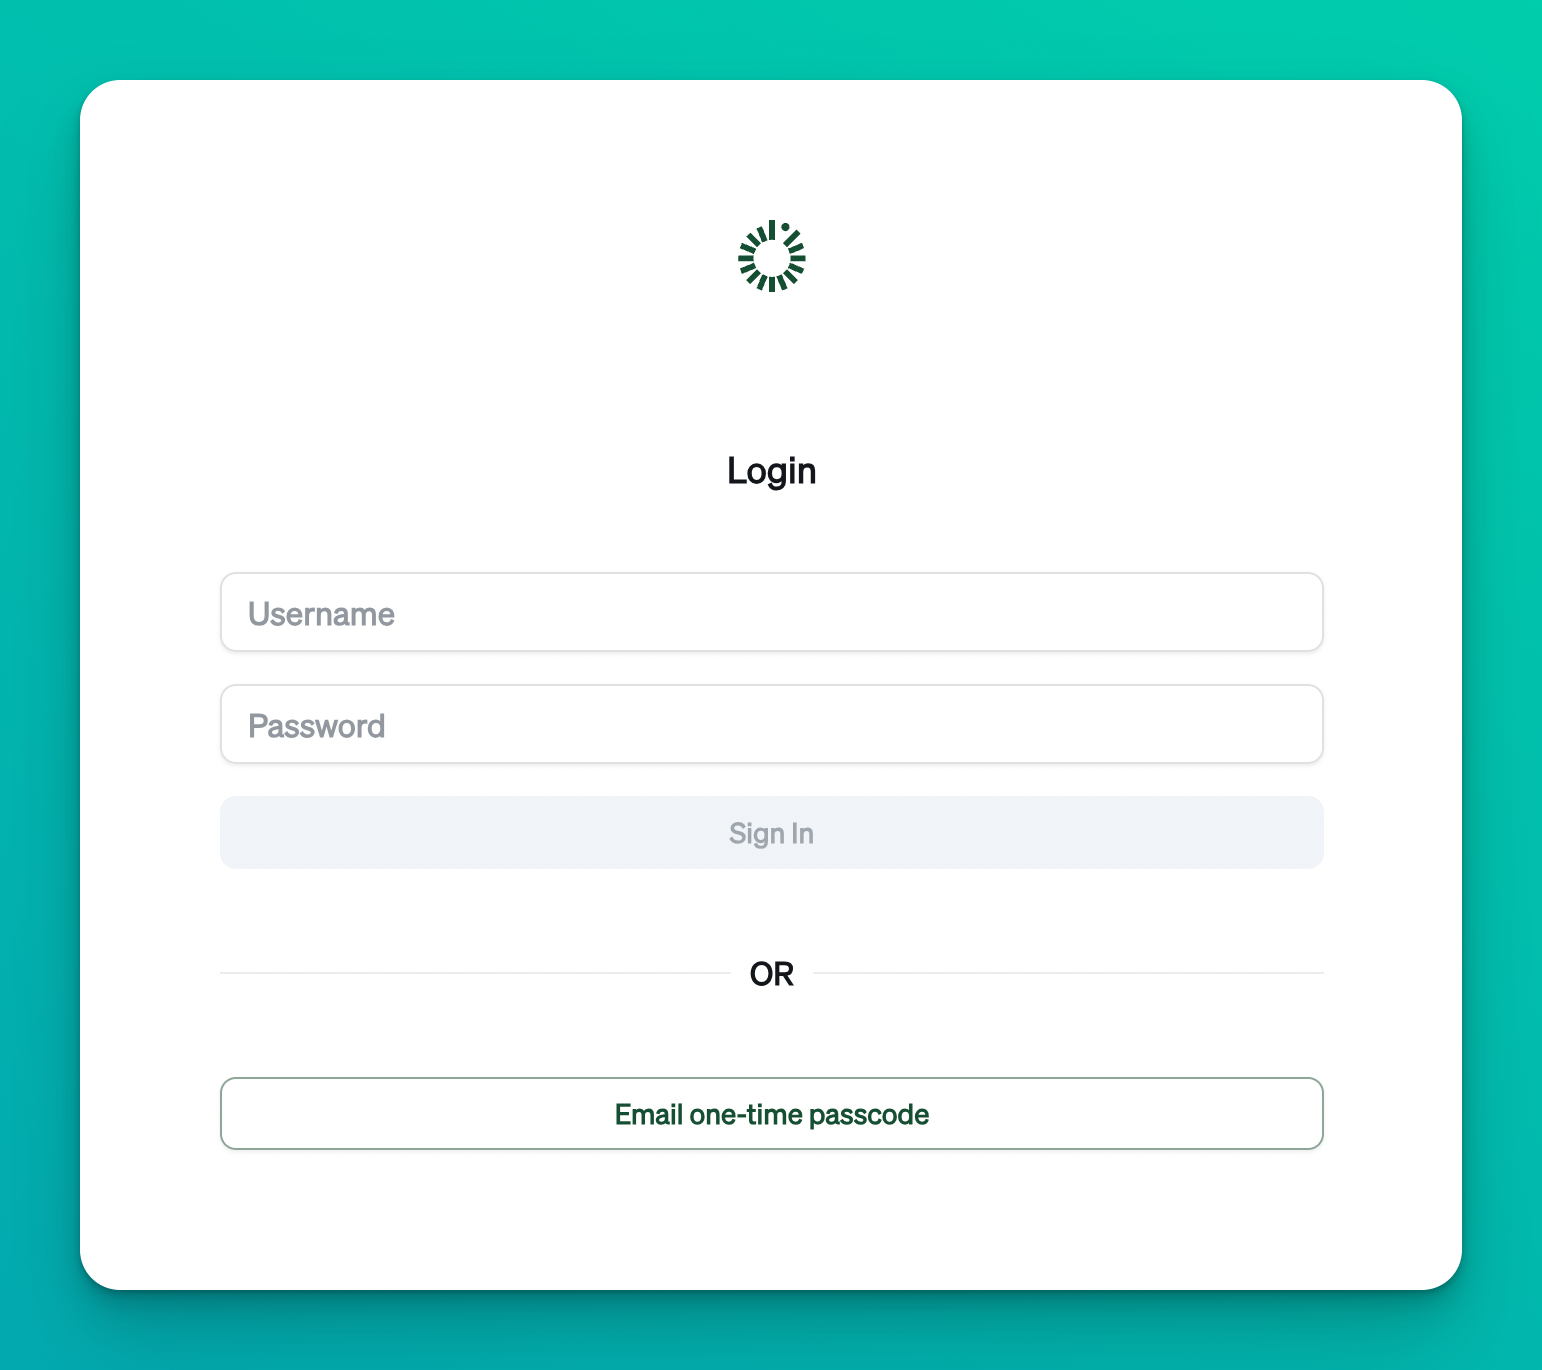
1.1 Login with Username and Password
Enter your registered email and password to access your account.
If you forget your password, you can use an alternative login method or contact support at support@kiwidata.com.
1.2 One-Time Password (OTP)
For added security, you can log in using a one-time password sent to your registered email or mobile device.
Simply enter the OTP when prompted.
1.3 Single Sign-On (SSO)
Kiwi currently supports SSO with Microsoft (Azure AD).
If your organization requires integration with another identity provider, please contact support@kiwidata.com for assistance.
2. Viewing Your Documents
You can view all your documents on the Document List page. By default, they are sorted by upload date.
2.1 Sorting Documents
A user can resort rows in the document grid by clicking any column header. Simply clicking the header will resort that column in alphabetical order.
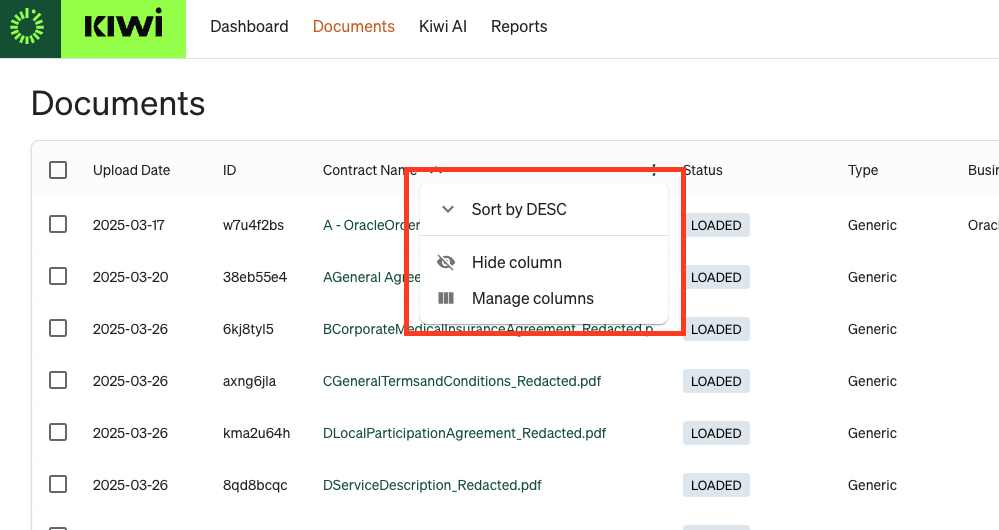
To hide a column, select the meatball menu on the header of the column and select 'Hide Column'. To bring that column back, select the options menu again, choose 'Manage Columns', and check the box next to the desired column.
To change the sorting order either alphabetically ascending or descending, click the sort arrow next to any column header. You can sort by attributes such as document name, type, or status.
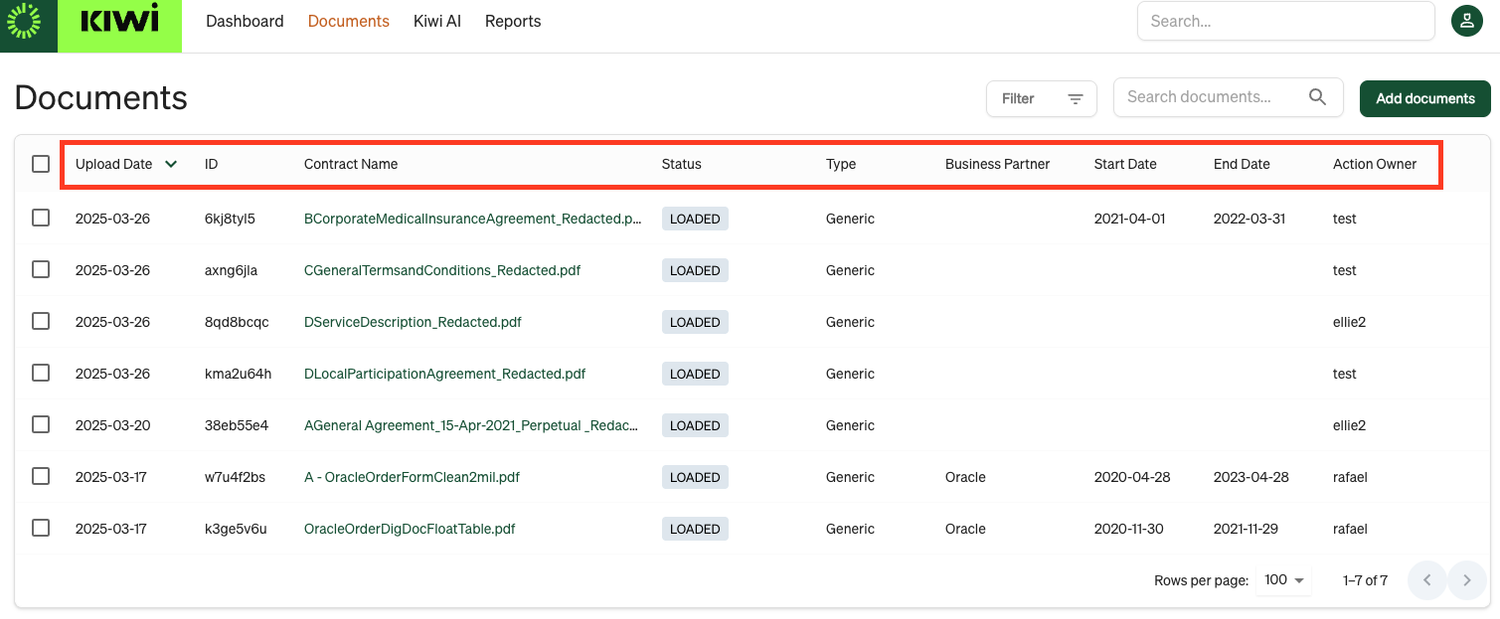

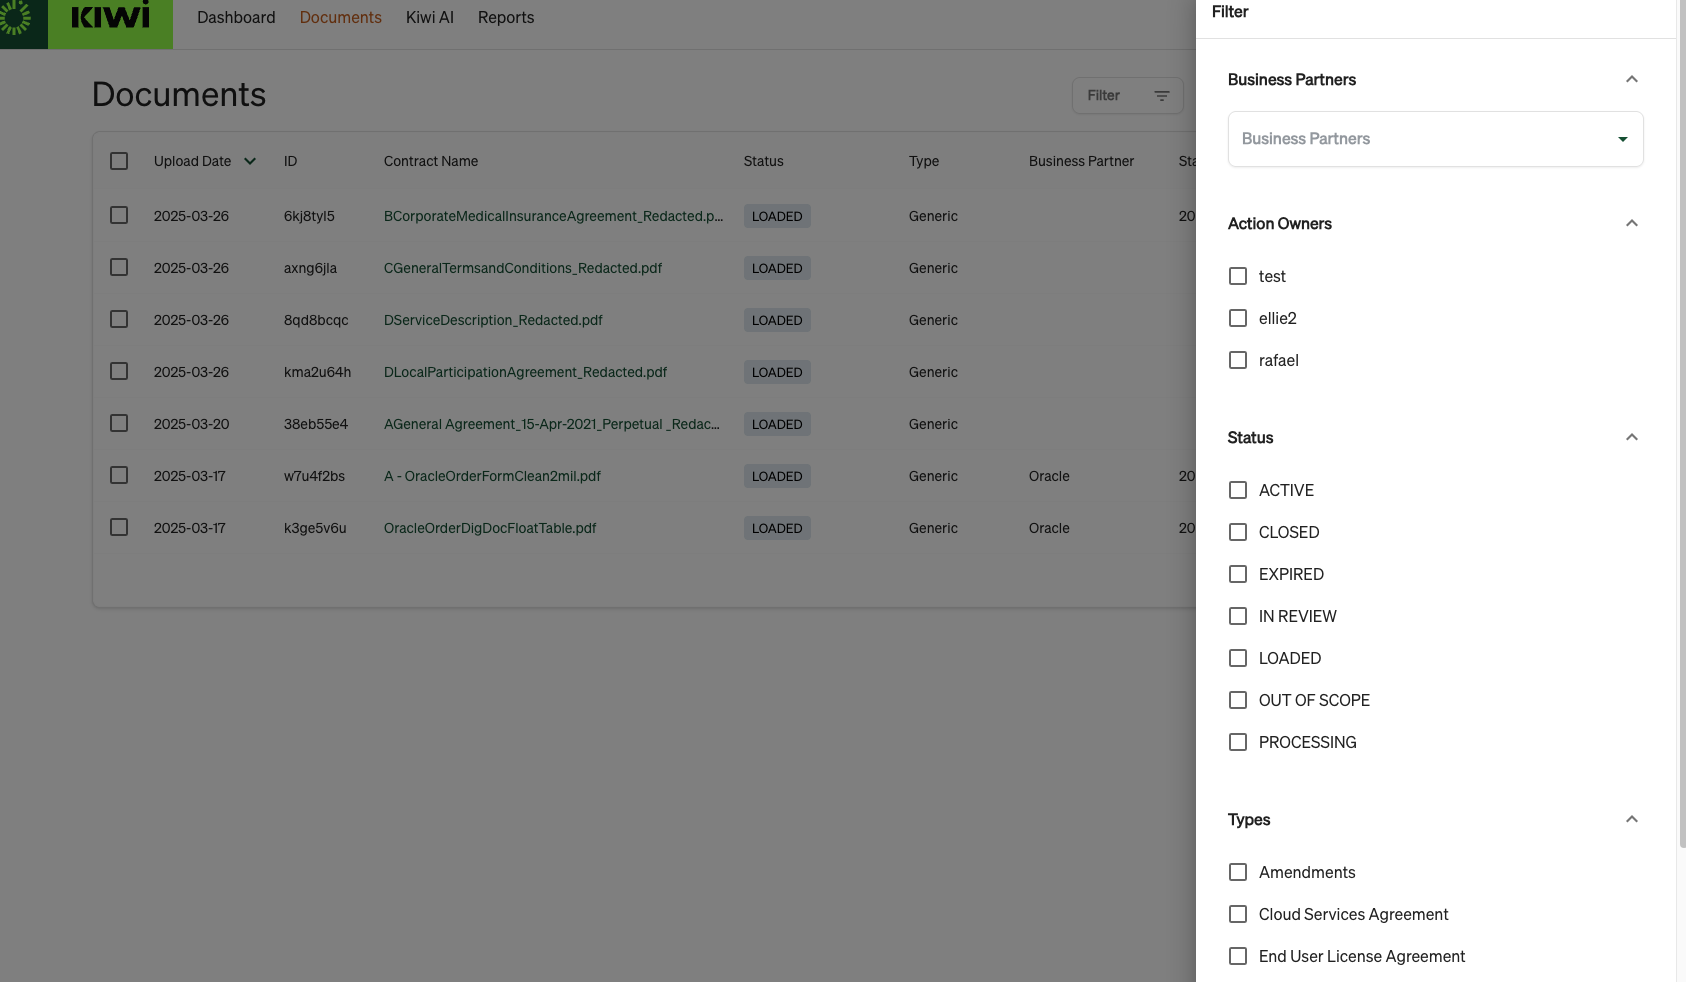
2.2 Filtering Documents
To find specific documents, click the Filter button and apply filters based on attributes like date, document type, or status.
3. Uploading Documents
Kiwi allows you to upload PDF, DOC, or DOCX documents effortlessly.
3.1 How to Upload
Click the Upload Documents button.
Select the files you want to upload.
If a document is already uploaded, Kiwi will notify you of the duplication and provide an option to view the existing document.
3.2 Processing Documents
Once uploaded, Kiwi will automatically process the document and extract relevant information based on its type.
If needed, you can manually review and adjust the extracted data.
4. Manual Review & Tagging
Kiwi identifies and categorizes document data into three types of tags: Attributes, Tables, and Clauses.
4.1 Attributes
Attributes represent specific details extracted from documents, such as:
Business Partner
Start and End Dates
Payment Terms
4.1.1 Editing Attributes
You can manually review and edit attributes using the right-side panel:
Select the attribute and modify the information.
Update the value by choosing from the document or manually entering it.
If selected from the document, Kiwi will normalize the format automatically.
<Add a screenshot or GIF>
4.1.2 Supported Attribute Formats
To modify attributes beyond the available options, contact support@kiwidata.com.
List: Predefined set of options (e.g., dropdown for Business Partners).
Text: Free-form text.
Date: Supports US and international formats.
Number: Integer or decimal values.
Currency: Numeric value with currency type (e.g., USD, EUR).
4.3 Clauses
Clauses represent specific legal or contractual sections within a document, such as:
Confidentiality & Privacy
PII Processing
Cross-Border Data Transfers
Termination for Convenience
Force Majeure
Clauses are organized into predefined clause groups for better categorization and management.
4.3.1 Reviewing and Editing Clauses
You can manually review and adjust clauses using the right-side panel:
Select the clause tag to view the extracted content.
Confirm the clause if the extraction is correct.
Reject the clause to remove it from the clauses.
To modify a clause, first remove the incorrect clause, then add the correct version.
To add a clause that was not extracted, click "Set Clause."
4.3.2 Requesting Clause Customization
Kiwi extracts clauses based on predefined models.
If your organization needs additional clause categories or modifications, contact support@kiwidata.com.
5. Searching Your Documents
To search for documents in Kiwi, follow these steps:
Type your search terms directly in the search bar on the home page.
Kiwi will search your document database and return the most relevant documents along with a summary of all references used to answer your query.
By clicking on any reference, you will be redirected to the source document for more details.
You can also use the sample questions provided to help you get started with your search.
Note: You can only search for documents that you have access to. Please refer to Managing Permissions for further details.
6. Viewing Reports
You can access your data by visualizing it as reports in Kiwi.
Reports are pre-defined and can be customized upon request to suit your organization's needs.
If your organization requires additional reports or dashboards, please contact support@kiwidata.com.
Note: Reports display information only from documents you have access to. Please refer to your permissions for further details.
7. Managing Permissions
Permission Groups ensure that only authorized individuals have access to your documents.
These groups are applied at the document level, meaning that users can search for or view reports only from documents they have permission to access.
7.1 Managing Permission Groups
To manage permissions:
Go to the Document section and open the Advanced tab.
Assign Permission Groups to each document individually.
A user can only assign Permission Groups they have permission to manage.
7.2 Requesting Additional Permission Groups
If your organization requires additional Permission Groups, please contact support@kiwidata.com.
8. Exporting Data
Kiwi provides various ways to export your data, ensuring that you can share extracted information with third parties as needed.
Note: You can only export data that you have access to.
8.1 Export Attributes
You can export attributes in CSV format by clicking the Download button.
Ensure that your browser allows downloads from Kiwi.
8.2 Export Table Tags
Table tags can be exported in CSV format by clicking the Download button.
Make sure your browser is set to allow downloads from Kiwi.
8.3 Export OCR Tables
Export OCRed Tables in CSV format directly from the documents.
You can check the full list of tables Kiwi has extracted from your document and download them individually or all at once.
Ensure your browser allows downloads from Kiwi.
8.4 Custom Exports
You can preformat or filter the data you wish to export.
An example, such as Service Now under Reports, is available.
Kiwi supports CSV and XLSX formats.
If your organization requires additional export formats, please contact support@kiwidata.com.
9. Getting Support
You can contact support in various ways and for different situations.
9.1 Submitting a Document Upload Issue
If a document upload fails, you can send the document directly to support.
This will automatically include error logs for easier troubleshooting.
9.2 Contacting Support via User Menu
You can reach out to support by adding your email and message directly from the User Menu on the home page.
9.3 Email support
For any questions or customization requests, please contact support@kiwidata.com.
Copyright © 2026. All Rights Reserved.
Life's too short to use mediocre software.